

The entire process of making a swirl or spiral or twirl in Photoshop is really easy and begins with agradient layer. This is the most important step and the swirl will look different depending on how the initial gradient looks like.
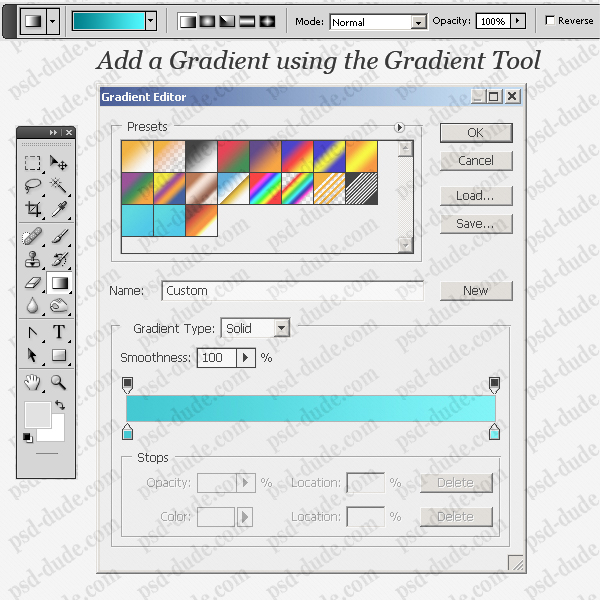
Create a new psd file, size 600/600px. Pick the Gradient Tool that you will find in the Paint Bucket Tool category on the main toolbar. I will not explain in detail this tool but I do plan to make a basic tutorial on how to use the Gradient Tool in Photoshop really soon.
You see that an additional toolbar appeared where you can change the gradient colors and also choose one of the five types of gradients (linear, radial, etc). I will choose a simple gradient with two tones of blue, one dark and one brite.
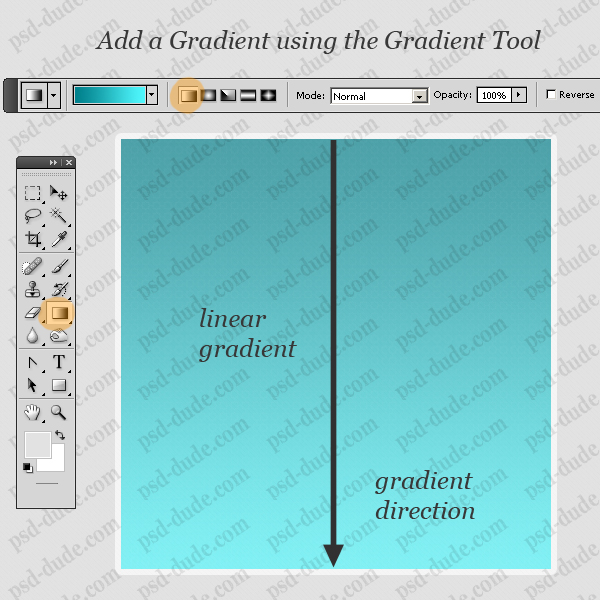
Choose Linear Gradient and fill the layer with this gradient. Simply draw a line on the screen with this tool and the gradient direction will follow that line. I choose a vertical line direction from the top center to the bottom center of the image. This is how your image should look like so far:
Make Swirl in Photoshop
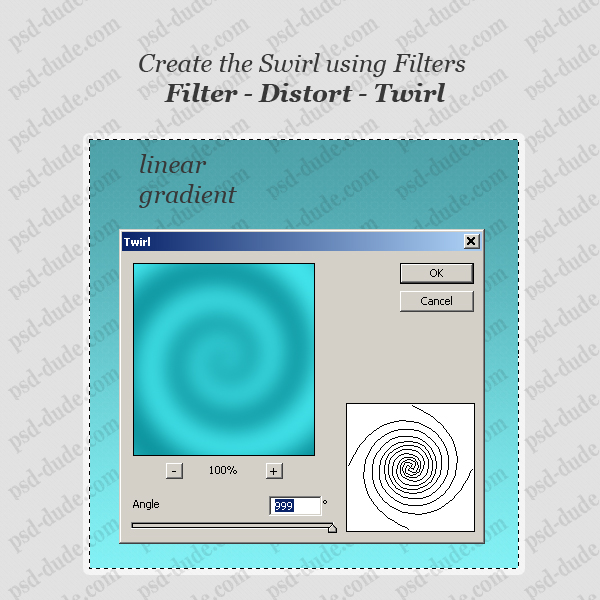
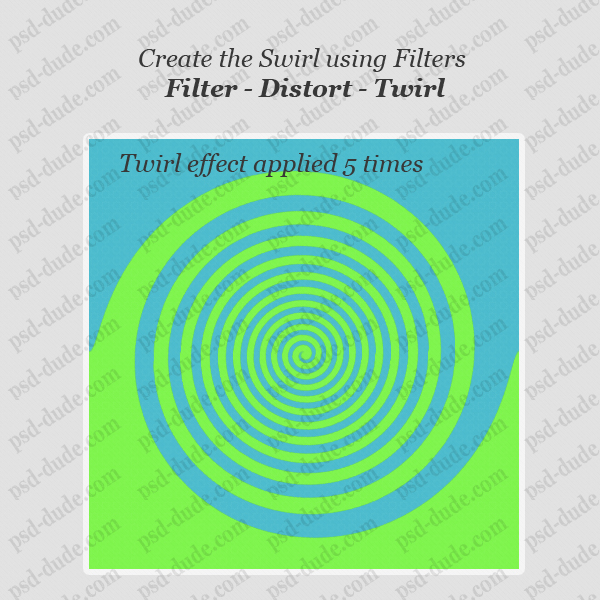
Now comes the fun part, where we will actually create the swirl. Go to the Filter Menu and chooseDistort. From the Distort menu pick Twirl. This name actually gives you a hint, because as you already know, twirl swirl spiral are actually synonyms. Choose maximum range for the angle, 999.
Swirl Effect in Photoshop

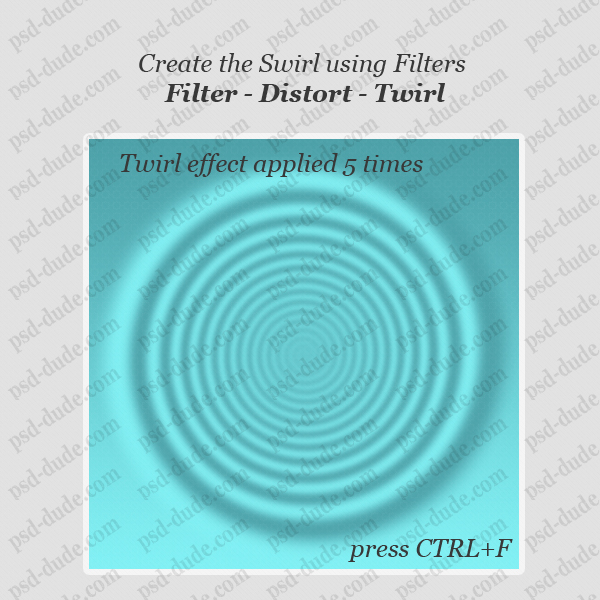
You can see that now it looks kind of soft, mainly because the gradient was soft also and the colors were not very contrastant. If you want a more defined swirl, press CTRL+F several times. This mean that you will apply the same Twirl Effect multiple times and the swirl will look better.
This is the entire process, simple, right?! But you can create different other effects depending on how your gradient looks like. In the following steps I will show you different effects that I have made. But you can also play to make your own beautiful swirls.
Perfect Spiral in Photoshop
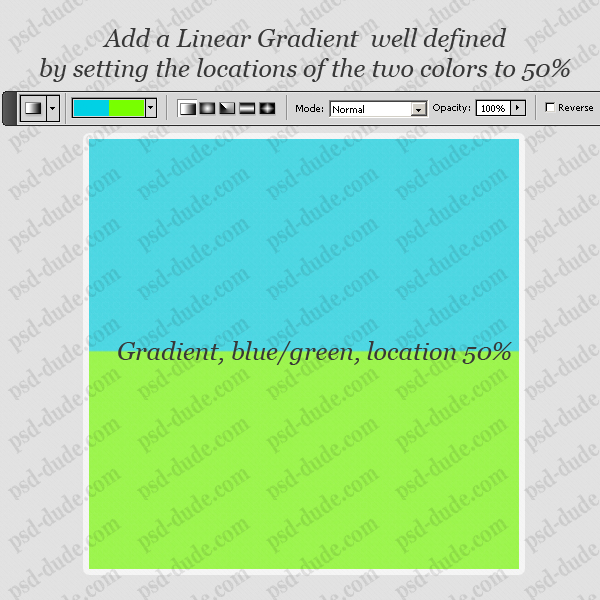
If you want to obtain a very defined spiral, start with the gradient and choose two different colors. Be careful to set the locations of the two colors to 50%. Add the gradient and apply the same Twirl Effect several times. This is how yor perfect spiral should look like:
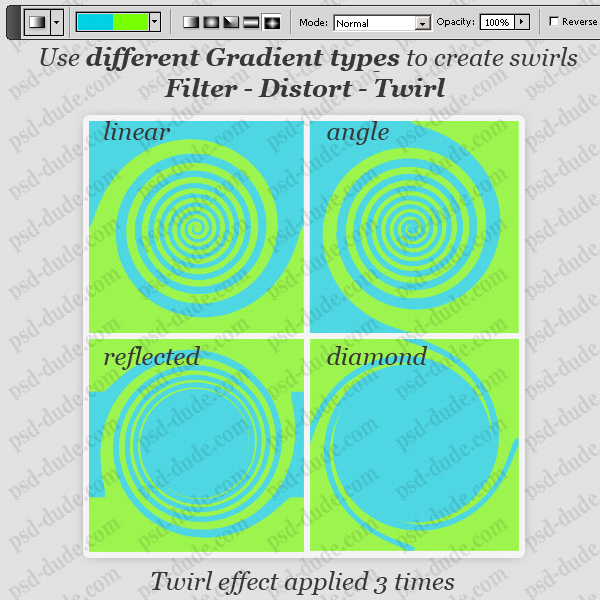
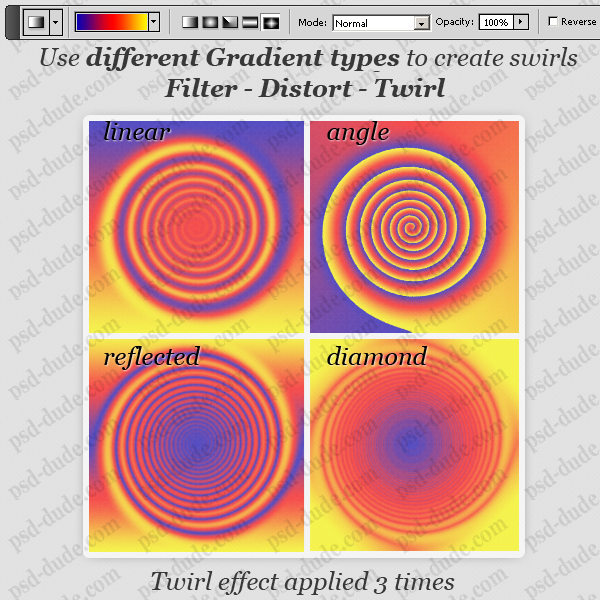
Use Angle, Reflected and Diamond Gradient to Create Swirls in Photoshop
Use the same gradient you did in the previous step but this time choose different gradient types, one at a time of course and then apply Twirl Filter. You can see in the image below the effects that will be obtained if you pick Angle, Reflected or Diamond Gradients.
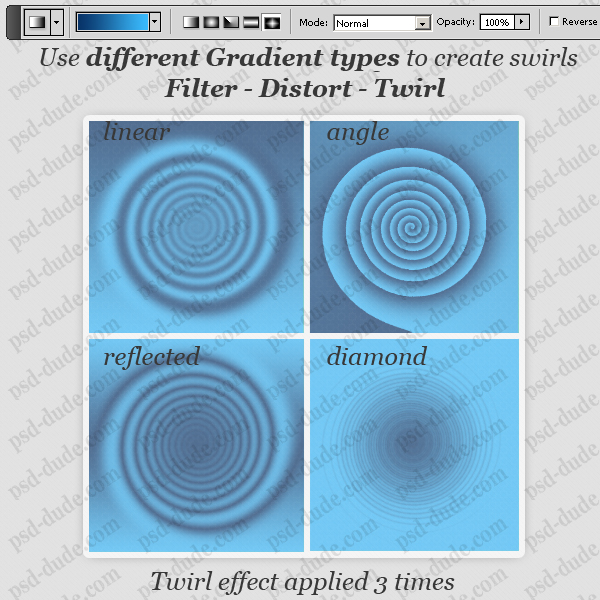
I want to show how the swirl will look like if we use the initial gradient, less defined with color one at 0% location and color two at 100% location. You may wonder why the Radial Gradient is not on my list; it is simply because I did not obtain a Swirl Effect using this radial gradient, but again you are free to experiment.
Using Twirl in Photoshop with more complicated gradients, you will obtain of course more complicated and beautiful swirls. Here are some samples.
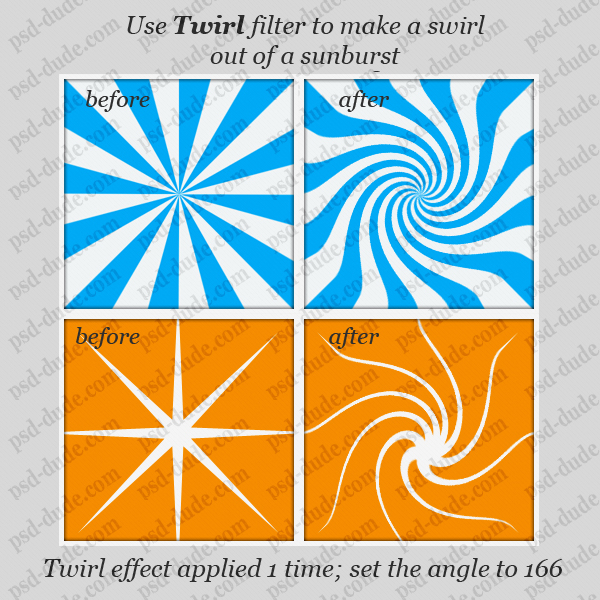
Sunburst Swirl in Photoshop
This cool Twirl Filter can be used in many ways to create interesting swirl effects in photoshop. One of my favorites is to use it to swirl a sunburst. So lets say we have the following types of sunburst; apply the Twirl Distort Filter and you can see the before and after effect
Just be careful to set the Angle of the Twirl Filter to 166 and not 999 like in the previous examples. An angle of 166 will work just fine; apply the filter only once.
Hope you have enjoyed this tutorial on how to create a swirl in Photoshop and come back for more tips and tricks. See you soon !


